Locations dashboard
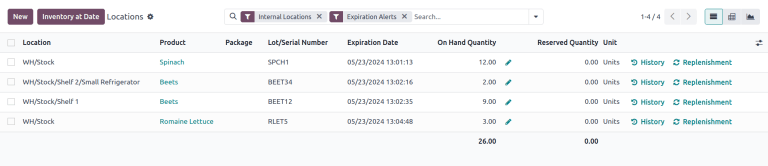
The Locations dashboard in the Inventory application provides an overview of on-hand storage locations for company products. Use this report to see where stock is stored, identify misplaced items , or view past inventory to see product locations on specific dates.
To access the locations report, the Storage Locations feature must be enabled. To do that, go to Inventory app ‣ Configuration ‣ Settings. In the Warehouse section, tick the checkbox for Storage Locations, and click Save. Then, access the locations dashboard by navigating to Inventory app ‣ Reporting ‣ Locations.
TIP
The Reporting menu in Inventory is only accessible to users with admin access .
Navigate the locations dashboard
By default, the Locations dashboard lists all on-hand products in stock (in the Product column), along with the following information:
Location: current storage location. If a product is stored at [Shelf 1] and [Shelf 2], the product is listed twice, showing quantities at each location.Package: the package that the product is stored in, if any.Lot/Serial Number: if the product has a lot or serial number, it is specified here.On Hand Quantity: current quantity of products. Click thefa-pencil(edit)icon tomodify the on-hand quantity.Reserved Quantity: on-hand quantity reserved for operations, such as pickings, delivery orders, or manufacturings.Unit: the unit of measure of the product.
Click the buttons to the right of each row item to access additional information:
fa-historyHistory: access the stock move history of the product, displaying information about the quantity and description of why the product was moved from one location to another.TIP
: note
This report can also be generated from the Lot and Serials Numbers page, accessed by going to Inventory app ‣ Products ‣ Lots/Serial Numbers. ::::
Stranded inventory report
Businesses using multi-step flows in the Inventory or Manufacturing apps, may have stranded items, which are products not in their proper storage locations, due to human error. Use this report to periodically check transfer locations (e.g. WH/Input, WH/Pre-Processing) to ensure items are moved to their intended storage locations, and accurately recorded in the database.
To get a list of items that might be sitting idly in storage, follow these steps:
Go to
Inventory app ‣ Reporting ‣ Locations.In the search bar, begin typing the name of the location where products are intended to be moved to, such as [WH/Input], or [WH/Packing].
Select the
Search Location for:[location name] option from the resulting drop-down menu that appears beneath the search bar.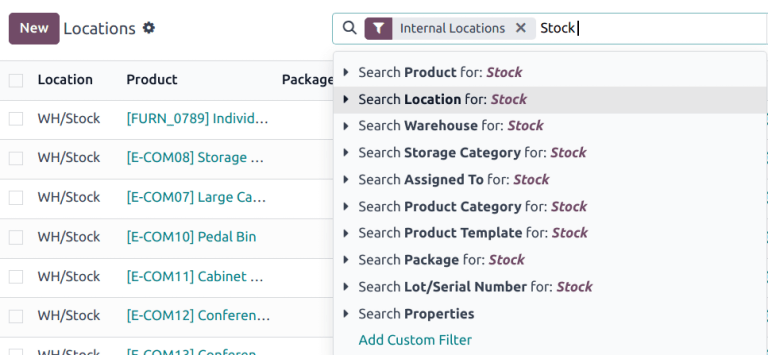
The report now displays a list of products at the transit location.
TIP
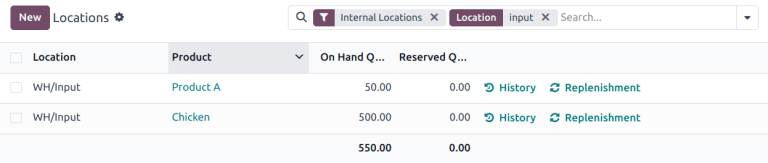
Searching [Input] in Location shows a list of products at a WH/Input location.
The list shows [500] quantities of [Chicken], which is alarming if not refrigerated soon after reception. The stranded inventory report helps identify items that have been idling in non-storage locations.
Inventory discrepancy report
To generate a report of items that have been moved since the last inventory audit , follow these steps:
Go to
Inventory app ‣ Reporting ‣ Locations.Then, click into the search bar to reveal a drop-down list of
Filters,Group By, andFavoriteoptions.Enable the
Internal LocationsandConflictsoption from theFilterssection.The report now displays items whose quantities have changed since the last cycle count.

Click the
fa-historyHistorybutton to view inventory transfers, including receipts and deliveries, that have occurred since the inventory adjustment.